Improving Your House with the Nest Thermostat
The Nest Thermostat: A Game-Changer in Home Temperature Control
Introduction
Thermostats have always been notoriously difficult to work with, often requiring users to navigate through a series of arrows to set their preferred temperature. Once set for a specific time period, making adjustments meant going through the entire process again, disrupting the programming. However, the introduction of the Nest Thermostat by Nest Labs revolutionized the industry, offering a user-friendly and efficient solution for home temperature control.
The Origins of the Nest Thermostat
The Nest Thermostat's success can be attributed to its creators, Tony Fadell and Matt Rogers, two former Apple engineers who joined forces in 2010 to address the shortcomings of existing thermostats on the market. Their expertise in product design and technology led to the development of a cutting-edge device that quickly gained popularity worldwide. In 2014, Google acquired Nest Labs, expanding the thermostat's availability to Canada and several European countries, including Belgium, Ireland, France, the United Kingdom, and the Netherlands.
Controversy and Parody Surrounding Google's Acquisition
Google's acquisition of Nest Labs and the Nest Thermostat was met with some skepticism and criticism. Some accused the tech giant of using the smart thermostat to collect personal data. In response, a German activist group called Peng Collective created a parody website called "Google Nest" in 2014, satirizing Google by releasing fake products that mimicked the company's offerings. The following day, Google's lawyers issued a cease-and-desist letter to Peng.
Technical Features of the Nest Learning Thermostat
Hardware Details
The Nest Thermostat boasts a wide range of wireless compatibility, supporting most standard HVAC systems that use central heating or cooling pumps. It consists of two main hardware components: the display, which houses the circuit board and rotating ring, and the base, which contains the connection terminals, bubble level, and wall anchoring holes. The device is also paired with a "Heat Link" that holds the circuits necessary to control the main voltage heating system. In Europe, Nest offers a special edition thermostat capable of controlling heating systems between 120 and 240 V.
Software Details
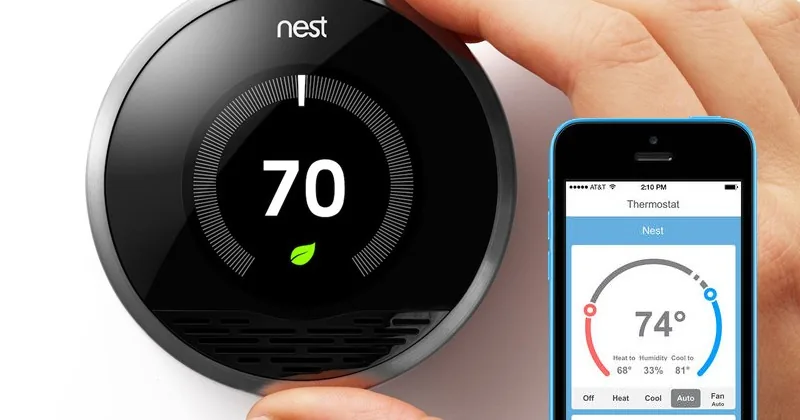
The Nest Thermostat's software is primarily controlled by spinning and clicking the control wheel, which brings up option menus for switching between heating and cooling, accessing settings, viewing history, and scheduling. The device can also be controlled via a touch screen. As an Internet-connected gadget, the thermostat can receive updates, additional features, and bug fixes remotely, provided it maintains a permanent connection to a Wi-Fi network and has a battery voltage of at least 3.7 V. The thermostat is based on Linux 2.6.37, making it open to free updates.
Other notable software features include:
- The thermostat's ability to learn and remember user settings after a few repetitions.
- The option to control the device using a smartphone (Android or iOS) while within the house.
- The ability to set a PIN to lock a specific temperature, preventing others from changing it.
Installing the Nest Thermostat
Before purchasing a Nest Thermostat, potential buyers are advised to use the compatibility widget on the Nest website to ensure their current heating system is compatible with the device. Once compatibility is confirmed, users can either install the thermostat themselves or seek assistance from a professional, which the Nest website can help locate.
For those opting for self-installation, the process involves shutting off power to the furnace, stripping an average of four wires (may vary), inserting them into the base's holes, and securely screwing the base to the wall using the built-in level. The Nest Thermostat comes with a small, reliable screwdriver, eliminating the need for additional tools.
After hardware installation, users must set up their Nest account by entering their Wi-Fi information and some details about their home. The thermostat will then learn the house's particularities within a matter of days.
Nest Thermostat Reviews and Purchasing Options
As a pioneering device in its niche, the Nest Thermostat has garnered numerous reviews from both specialized sources and users. These reviews can be found in magazines, dedicated websites, and on sites that sell the gadget, such as eBay, Home Depot, Lowe's, Amazon, and the Nest site itself. These retailers offer the thermostat year-round, with discounts, coupons, sales, and Black Friday deals.
The Nest Thermostat has had three generations so far, each with a different price range:
- 1st generation (2011): Smaller with a thicker profile
- 2nd generation (2012): Superior hardware and software compared to the 1st generation
- 3rd generation (2015): Superior hardware and software compared to the 1st generation
According to online reviews, the Nest Thermostat has the following pros and cons:
| Pros | Cons |
|---|---|
|
|
Conclusion
The Nest Thermostat has revolutionized the way we control temperature in our homes, offering a user-friendly and efficient solution that allows users to save money on heating. Despite some controversies and limitations, the device has become a beloved and widely used gadget around the world, thanks to its innovative design and features.
Sources & further reading
- Google Nest Thermostats
- ENERGY STAR. Smart Thermostats