Honeywell Thermostat Troubleshooting - A Six Step Guide

Published by 
AllThingsHVAC
Last updated: 
October 25, 2019

Thermostats serve one purpose – to set the indoor temperature. To this end, they all display different features in terms of accuracy, reliability, size, and more. While there are slight deviations between models, design, ease of installation and maintenance are usually the main deal makers for most customers. Somehow, the criteria list seems too short. Did we overlook something? Why yes, brand. When choosing for a sleek-looking, top-notch home appliance, you trust the giants in the field to sell you ingenious devices that border on sci-fi territory. Honeywell is one such label present in almost every household on the American continent. Along with straightforward management software, their products adapt well to your indoor climate demands. However, if problems arise, you might have to engage on a Honeywell thermostat troubleshooting crusade.

Don’t let the thought discourage you, though. You may not realize it, but when it comes to issues with your Honeywell thermostat, you just might have it in you to resolve the issue yourself. Even if you don’t have much knowledge about Honeywell thermostats, just like all appliances in your home, you can always try out a couple of troubleshooting tips that may get you back in business. Today, we are going to be doing just that. In our article, we are going to explore a few of the most important troubleshooting tricks that every owner of a Honeywell thermostat must know. While our tips may not fix every issue you will deal with, these tips certainly are the right steps to take in order to help guide you on what to do next. You will likely find that with a couple of lid flips, clicks, and disconnections, you may be able to save yourself the hassle of having a professional come out to take a look at your unit. And if you don’t have any issues with your Honeywell thermostat yet, then knowing these tips can save you the stress of freaking out when something does go awry. Let’s get started!

Our Favorite Honeywell Thermostats

Whichever issue arises, we can all agree that a faulty thermostat is not a great way to start the day. You wake up in the morning and it’s too cold to get out of bed. On the other hand, you might roast in global warming temperatures in the middle of the night if your thermostat decides to cross the Fahrenheit thresholds. Identifying the problem is part of the solution, so let’s see if your device has reached the end of its shelf life or you can still count on the old heating/cooling system for comfort in your home.

Even if your system does pose problems not listed below, try these Honeywell thermostat troubleshooting tips first. Who wouldn’t want to avoid the expense of calling an outside specialist to deal with an internal problem?

Honeywell Thermostat Troubleshooting Guide – Fix the Temper on Your Temperature Stat

Analog or Digital Thermostat?

if Honeywell thermostat troubleshooting fails, Replace your thermostat

Depending on the Honeywell thermostat in your home, the issues to address will vary. The thermostat conditions the indoor climate - the AC, the heat pump or the furnace - to generate the desired temperature.

Electronic Thermostats – Honeywell Thermostat Cool On Flashing and Battery Check

An electronic thermostat basically runs on an automatic switch. Its mission is to turn your AC on and off at certain temperatures. If your unit is on the blink, the issues usually root in:

  1. Compressor protection. In this case, along with the Honeywell thermostat flashing, a "cool on" or "heat on" message pops up as well.
  2. Low Batteries. If your analog thermostat is on the fritz and you have no doubt that it has been installed and programmed properly, try replacing the batteries. A lot of homes have electronic thermostats that run on battery power. While a ‘Replace bat’ message always sounds the alarm when your thermostat runs low on batteries, a wise move would be to change them periodically nonetheless.

Several other issues may occur. The older models of thermostats are usually the analog kind displaying the minimal features. They come equipped with the basic three buttons for heating, cooling and turning off. They are not programmable as their digital counterparts. As it goes, you may be able to fix the troubleshooting with a few simple adjustments.

First, be sure your thermostat is mounted on the level with the wall. Otherwise, the mercury switch may be tilted and the reading of the room temperature off. Check that with a small torpedo level. Usually, it should be located about 5 feet from the floor. Never put it in a corner or behind a closet. Ideally, it should be able to sample the air in the room with no interference.

Start by removing the thermostat cover. Check the insides for dust, dirt, or corrosion. Use a soft brush or cloth to wipe it off, if that’s the case. Usually, the main culprit is the one you least suspects. In our case, dust.

Next, make sure the colored wiring is connected properly inside the unit. Use your guiding manual for the test. If all is fine, then the issue is either with the furnace or AC. In the worst case scenario and if all Honeywell thermostat troubleshooting fails, you need to get a new thermostat.

Fix the Mood Swings on Your Digital Thermostat

Opening up a Honeywell thermostat troubleshooting

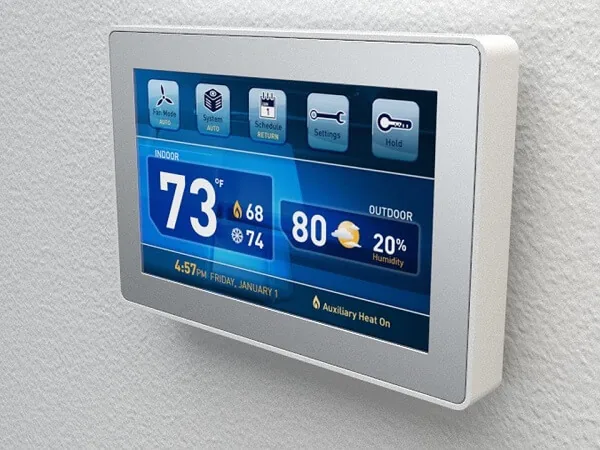
Digital programmable thermostats work around your schedule. If you install them in a business set-up or your home, you know you’re dealing with smart response technology. Some Honeywell devices feature keypads with digital displays. Others work via a touchscreen so there are no fiddly buttons of the yesteryear. While the newest generation of thermostats allows you total control from a distance via your smartphone, computer, or tablet.

Of course, the more options in a thermostat, the more can go wrong. However, before calling the serviceman, make sure you’ve tried all the easy fixes to treat the problem yourself.

Honeywell Programmable Thermostat Manual for Troubleshooting

Step 1 – No Life Signs on the Display

Honeywell digital thermostats share one common problem. Sometimes, the display screen doesn’t read anything. If your thermostat is connected to a furnace, check the furnace door. If it’s not shut properly, then the door switch will not activate the central HVAC system. you can find details about these processes in the Honeywell programmable thermostat manual.

Step 2 – Bring Out the Room Thermometer

Honeywell programmable thermostat manual

Just an intuitive flash, but before disassembling the device and pronouncing it irreversibly dead, you might want to check the room temperature on a thermometer. If your thermostat doesn’t match your findings, then the temperature sensor is probably malfunctioning.

This might prove to be more of a burden than you think, since purchasing an entirely new unit will be more cost-effective than buying a replacement for a broken part.

In the case of a thermostat connected to a furnace, set the thermostat temperature five degrees higher than the room temp. At that point, the furnace should kick in.

Step 3 - Balance the Two Temperatures

Calibrating while Honeywell thermostat troubleshooting

This next step is to tick off the set point calibration test. That means you need to match the set point, or desired temperature with the room sensors on your thermostat, that is your surrounding space temperature. Read the instruction manual for further guidance. Thermostats come in different models, so they might exhibit various calibration techniques.

You can also check if your thermostat has any guided assistance written on the inside of the cover. Remove the baseplate and check before calling the manufacturer.

Step 4 – A Unit with a Short Fuse and Honeywell Thermostat Blank Screen

If your thermostat is acting up, check your unit’s fuses. One reason the thermostat display might read blank it’s because the circuit breakers on your central air conditioner or furnace might have tripped.

First, try flipping the breaker switch to the Off and back to the On position. Resetting the fuse will let you know if the circuits are disconnected. If in the end you need to replace the fuses and you don’t know how to proceed, you might want to call a professional to the scene.

Step 5 – Your AC or Furnace Must Have Its Wires Crossed

Honeywell thermostat troubleshooting by fixing the wiring

Typically, inside a Honeywell thermostat, small colored wires are labeled R, W, Y, G, C. If any of these are not in the correct positions, then you have a really crossed AC. You just need to defuse all that and reinstall the loose wiring.

The Red wire usually represents the 24-volt main power supply for the thermostat, White is for heat, Yellow is for cooling, Green is the indoor fan, while the C terminal stands for common ground. This wire provides power from the heating or cooling unit to the thermostat through low voltage. If you can’t spot any wires connected to C, then the thermostat is powered by a battery.

We mention this again – not all thermostats follow the rules above so it’s safer to refer to the color code chart in your instruction manual before operating on the wiring hookups.

Also, apart from being disengaged, your wires might suffer from a severe case of corrosion. On the other hand, you might be dealing with a short-circuit. To ensure electrical continuity, try hooking your wires with twist-on wire connectors, or wire nuts. Make sure all connections are tight so that electricity runs properly through. Most of the times, Honeywell thermostat troubleshooting boils down to coupling a few wires together.

Warning Tip! Even if only 24 volts run through the thermostat, it’s always a good idea to turn off the main power supply when touching wires together.

Step 6 – Set the Right Day and Time

If none of the above works, don’t lose hope. One last step to take in your Honeywell thermostat troubleshooting crusade before you throw your stat out the window is to verify the clock is set to the correct day and time. Electronic thermostats have these minor hiccups where the wrong day and time can impede proper function.

Typically, the default setting reads four segments of the day:

  • 6:00 a.m. is Wake.
  • 8:00 a.m. is Leave.
  • 6:00 p.m. is Return.
  • 10:00 p.m. is Sleep.

Of course, you’re free to readjust the settings if your schedule runs on a different course.

Step 7 – If All Else Fails, Consider a Replacement

New Digital Honeywell thermostat troubleshooting

If you’ve run your Honeywell thermostat troubleshooting through all these simple tests, and the device is still not responding properly, you could be dealing with less of an electrical problem and more of a mechanical one. Or the thermostat itself might be faulty.

Make sure your thermostat is indeed broken before you start snapping the wires loose and unplugging it from your furnace or AC unit. To keep the transition to a newer thermostat to minimum hassle, just choose a new model that abides by roughly the same size and shape as the old one.

Your thermostat is the control center for your HVAC system. Understandably, you wouldn’t want to get to the point where you’re operating Honeywell thermostat troubleshooting on and off. So the just aim at the issue at the hand with all the handyman weapons at your disposal and blast the trouble away.

Image sources: 1, 2, 3, 4, 5, 6

All Things HVAC

We formed this web site so consumers could have an educational place to go for good, solid information.  We are not trying to sell you anything.
Copyright © 2024 AllThingsHVAC. All Rights Reserved