Everything You Need to Know About Heating Tape
Introduction
During the cold winter months, it's essential to insulate your pipes to prevent them from freezing. Frozen pipes can lead to a lack of running water and potential damage to your plumbing system. According to the American Red Cross, "pipes that freeze most frequently are those that are exposed to severe cold, like outdoor hose bibs, swimming pool supply lines, water sprinkler lines, and water supply pipes in unheated interior areas like basements and crawl spaces, attics, garages, or kitchen cabinets" . One effective solution is to install heating tape or heating cable on your pipes to maintain a consistent water flow throughout the freezing season.
What is Heating Tape and Cable?
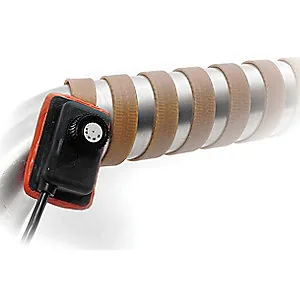
Heating tape and cable are devices that consist of electrical wires encased in a flexible material. When plugged in, they regulate the temperature of PVC, plastic, or metal pipes, preventing them from freezing. These products are designed to be wrapped around pipes and provide a consistent heat source .
Differences Between Heating Tape, Heating Cable, and Heating Cord
While often confused, heating tape, heating cable, and heating cord have distinct differences:
- Heating Cable: Somewhat stiff, like a garden hose, and ideal for wrapping around pipes without shrinking. Can be cut to length and terminated.
- Heating Tape: Extremely flexible, making it suitable for tight contours and oddly shaped pipes. Comes in fixed lengths (2-20 feet) and cannot be cut or trimmed.
- Heating Cord: As flexible as heating tape but allows for imprecise wrapping. Can be built to order or sold in fixed lengths (3-24 feet).
Heating cable is designed not to exceed a specific temperature, reducing the risk of overheating. However, a thermostat is still required to regulate the temperature. Heating tape and cord do not have built-in temperature limits and can overheat if not properly controlled .
Proper Installation Techniques
When installing heating tape, it's crucial to wrap it tightly and perfectly around each pipe. If any segment of the tape has both sides exposed to air, it will not transfer heat beyond that point, leading to overheating and breakdown. Heating cord and cable are more forgiving in terms of wrapping technique.
Types of Heating Tape
Several types of heating tape are available, each designed for specific applications:
| Type | Application | Temperature Range |
|---|---|---|
| Silicone Rubber | Resistant to chemicals and moisture | Up to 450°F |
| Fiberglass-Insulated | For electrically conductive and non-conductive surfaces | Up to 900°F |
| Samox | Woven fabric for high-temperature applications | Up to 1400°F |
| Frostex | Ideal for mobile homes with water lines under the house | N/A |
| Heat Sink Thermal Tape | Attaching heat sinks to ICs | N/A |
Installation Steps and Tips
To install heating tape, follow these steps:
- Remove any old heating tape completely, as it cannot be repaired and should not be reused.
- Fasten the new heating tape to the water line according to the manufacturer's instructions, avoiding sharp bends and ensuring it's not too tight.
Additional tips for safe and effective use:
- Never plug in the heating tape if there is no water in the pipes.
- Ensure the water line is not sitting directly on the ground after installation.
- Do not add insulation unless specified by the manufacturer, as it may cause overheating.
- If the pipe runs through a culvert, wrap the tape as far as possible and insulate the culvert's top to shield against cold air, frost, or rain.
- Test the heating tape by stretching it out, plugging it in, and checking for even heating.
- Use outdoor extension cords rated for low temperatures if necessary.
- Never plug in a coiled heating tape.
- Do not install heating tape on pipes running through walls, floors, or ceilings, but it can be used on roofs or in gutters.
- Choose a heating tape suitable for your specific water pipe material.
- Read and retain the manufacturer's instructions for future reference.
Conclusion
Heating tape and cable are effective solutions for preventing pipes from freezing during cold winter months. By understanding the differences between the various types and following proper installation techniques, you can ensure a consistent water supply and avoid potential plumbing issues. Always prioritize safety when working with electrical equipment, and consult the manufacturer's instructions for specific guidance.
This article is for informational purposes only and should not be considered a substitute for professional advice. Always consult a licensed plumber or electrician for assistance with installing or maintaining heating tape and cable.